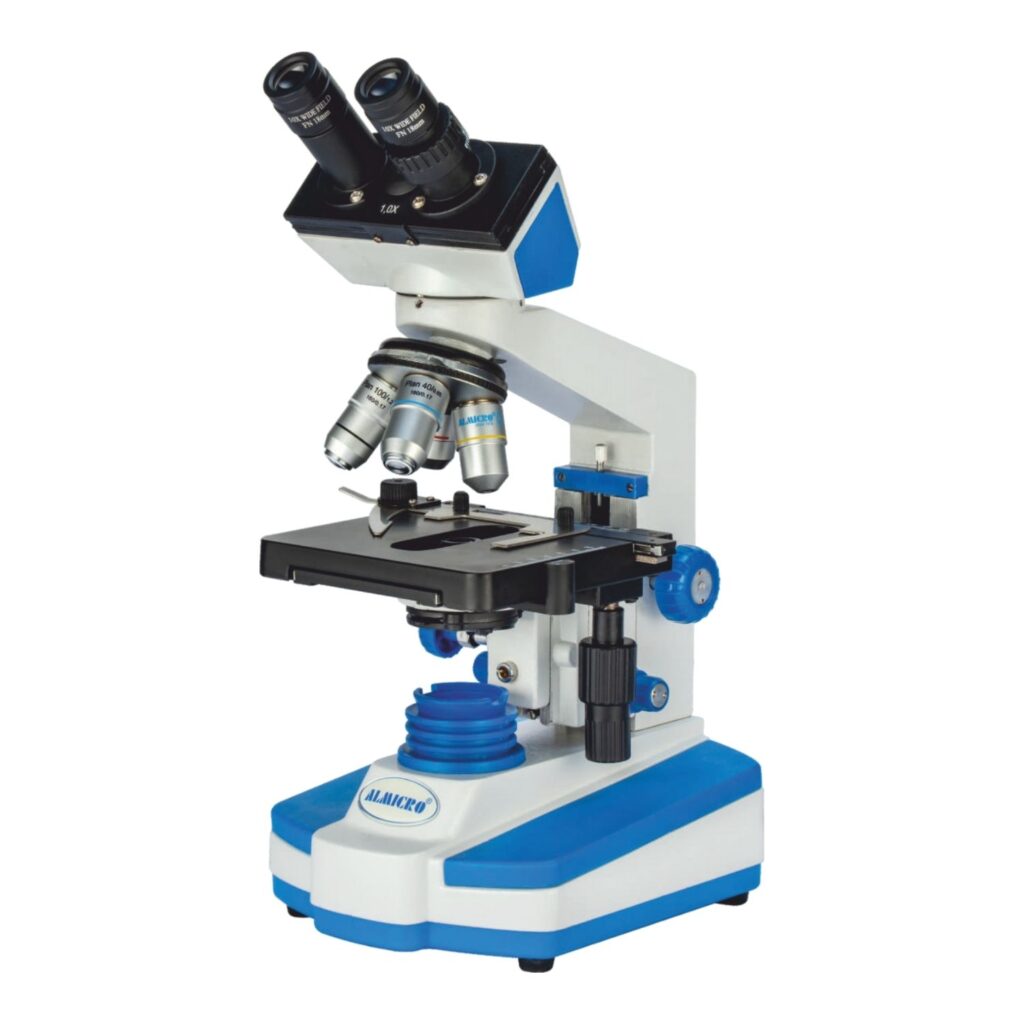
Bright Filed Microscope Overview
Bright field microscope basics matter in labs, classrooms, and routine testing. You use this microscope for daily work. You choose it for clarity, cost control, and simple operation. This content explains bright field microscopy in direct terms. Each section focuses on what you need to know and how you use it. A bright field microscope works with visible light. Light passes through your sample. The background stays bright. The sample looks darker. Color or density creates contrast. You see details because parts of the sample block or absorb light.
You use bright field microscopes in biology labs, medical labs, schools, and industry. You rely on staining and thin samples. You gain fast results with low setup time.
Definition of a bright field microscope
A bright field microscope is an optical microscope. You place your sample on a glass slide. Light travels upward through the slide. The objective lens collects light. The eyepiece enlarges the image. You view a dark specimen on a bright background.
This method suits fixed samples. You stain cells or tissues before viewing. Unstained samples appear faint. Contrast stays low without staining.
Historical context
Bright field microscopy started with early lens experiments. Simple lenses led to compound microscopes. Improvements in glass quality increased image clarity. Labs adopted bright field microscopes for routine work. Teaching labs still depend on this system today.
You still see this microscope in basic research. You also see digital upgrades in modern units.
Bright Microscope Diagram

Bright-Field Microscopy of Bacteria
Bright-field microscopy is the most common type of light microscopy, where the sample is illuminated with white light from below, and observed from above. In a bright-field image of bacteria, you typically see:
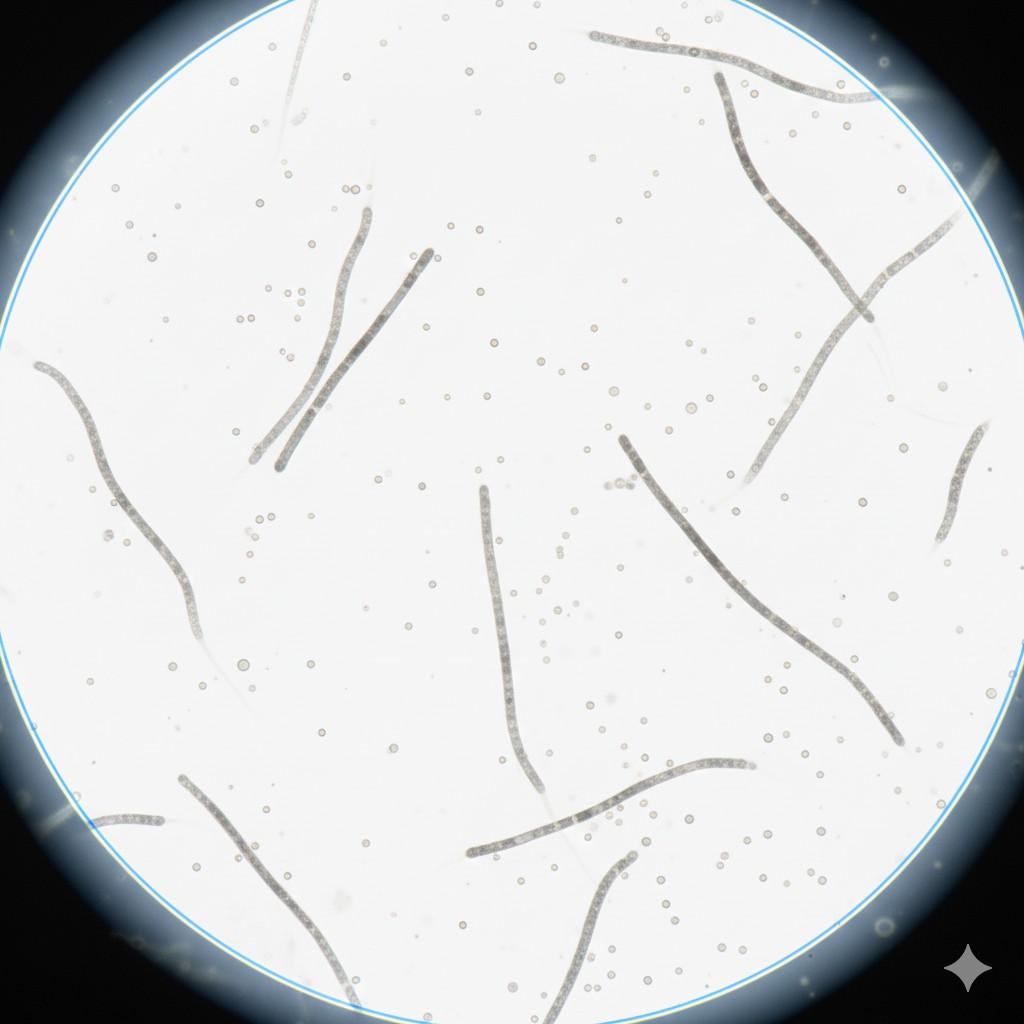
- Dark Organisms on a Bright Background: Bacteria, being denser than their surroundings, absorb or scatter some of the light, appearing as darker structures against a brightly lit background.
- Limited Detail without Staining: Unstained bacteria often appear somewhat transparent and lack strong contrast, making internal structures difficult to discern. Staining is frequently used in bright-field microscopy to enhance visibility and differentiate between different types of bacteria or their components.
- Overall Morphology: You can generally observe the basic shape (cocci, bacilli, spirilla) and arrangement of bacterial cells.
Principle of bright field microscopy
The working principle depends on light absorption. Light enters from below. The condenser focuses light onto the sample. Parts of the sample absorb light. Other parts transmit light. Differences in light intensity form the image.
If your sample lacks natural color, staining becomes required. Stains bind to cell structures. Bound dye increases contrast. You gain visible detail.
Main components and their functions
Optical components
Objective lenses sit on a rotating nosepiece. Common magnifications include 4x, 10x, 40x, and 100x. The 100x lens uses oil. Oil reduces light loss. You gain higher resolution.
The eyepiece magnifies the image from the objective. Standard eyepieces provide 10x magnification. Total magnification equals objective power multiplied by eyepiece power.
Mechanical components
The stage holds your slide. Mechanical stages move slides along X and Y axes. You control movement with knobs. You position the sample with control.
Coarse focus knobs move the stage quickly. You use these first. Fine focus knobs adjust sharpness. You use these for final clarity.
The body tube aligns lenses. Proper alignment keeps image quality stable.
Light source and condenser system
The light source sits at the base. Modern microscopes use LED lamps. LED units reduce heat and power use.
The condenser sits below the stage. You adjust condenser height for focus. The iris diaphragm controls light amount. You close the diaphragm to increase contrast. You open it to increase brightness.
Working process step by step
You place the slide on the stage. You select the lowest objective lens. You switch on the light source. You adjust the condenser and diaphragm.
You raise the stage with the coarse focus knob. You watch through the eyepiece. You stop when the image appears. You refine focus with the fine knob.
You rotate to higher magnification. You refocus with fine adjustment only. You add immersion oil before using the 100x lens.
You keep lenses clean during this process.
Sample preparation methods
Bright field microscopy depends on proper preparation. Poor preparation leads to poor images.
Fixation
Fixation preserves structure. Chemicals stop decay. Common fixatives include formalin and alcohol. Fixed samples resist distortion.
Staining
Staining adds contrast. You choose stains based on sample type.
Examples include methylene blue for simple cells. Gram stain separates bacteria types. Hematoxylin and eosin stain tissues.
Mounting
You mount samples on clean slides. You place a coverslip on top. Mounting medium prevents drying.
Thin sections work best. Thick samples block light.
Types of bright field microscopes
Monocular models
You use one eyepiece. Schools use these units. Cost stays low. Eye strain increases during long use.
Binocular models
You use two eyepieces. Eye comfort improves. Teaching and routine labs prefer this type.
Trinocular models
You add a camera port. You capture images. You record videos. Research labs and documentation work use this design.
Magnification and resolution explained
Magnification enlarges the image. Higher magnification shows smaller details. Resolution defines detail separation. High magnification without resolution adds blur.
Resolution depends on numerical aperture and light wavelength. Oil immersion increases numerical aperture. You see finer detail with oil.
Maximum useful magnification stays around 1000x. Higher values add empty magnification.
Image quality factors you control
- Light intensity affects contrast. Too much light washes out detail. Too little light reduces visibility.
- Condenser height affects focus. Improper height lowers resolution.
- Diaphragm setting affects depth of field. Smaller openings increase depth. Larger openings increase brightness.
- Lens cleanliness affects clarity. Dust and oil cause blur.
Advantages in daily use
- Bright field microscopes suit routine tasks. You set up quickly. Training stays simple.
- Benefits include low purchase cost. Maintenance stays easy. Spare parts stay available. Teaching becomes straightforward.
- You use common stains. You follow standard protocols.
- Limitations you must know
- Transparent live cells show low contrast. Staining kills cells. Live imaging stays limited.
- Thick samples block light. Image detail drops.
- Resolution stays below advanced techniques. You avoid this method for nanometer scale work.
Applications across fields
Biology and life science
You study cell structure. You analyze tissues. You identify bacteria. You examine plant sections.
Medical and clinical labs
You inspect blood smears. You detect parasites. You study tissue biopsies. You screen urine sediments.
Education and training
Students learn microscope handling. You teach optics basics. You demonstrate cell types.
Industrial and quality control
You inspect materials. You check surface defects. You review fiber structure.
Pharmaceutical and food labs
You check microbial growth. You inspect contamination. You monitor formulation samples.
Comparison with other microscopy methods
Bright field microscopy uses simple optics. Phase contrast improves contrast in live cells. Dark field highlights edges on dark backgrounds. Fluorescence targets specific molecules with dyes.
You choose bright field for routine stained samples. You switch methods for live or low contrast work.
Maintenance practices you follow
- You clean lenses with lens paper only. You avoid harsh chemicals.
- You switch off light after use. You cover the microscope. You store in dry space.
- You remove oil after oil immersion use. You check alignment during routine service.
Modern upgrades in bright field microscopes
- Modern systems include LED lighting. Digital cameras integrate easily. Software supports measurement and image storage.
- You attach cameras for teaching. You archive images for reports.
Bright field microscopy in workflow planning
- You select bright field microscopes for high volume labs. You train staff quickly. You control costs.
- You pair this method with staining protocols. You achieve repeatable results.
Future use outlook
Bright field microscopy continues in basic labs. Digital tools expand usability. Education and diagnostics still rely on this method. You choose bright field microscopes for stability, simplicity, and routine work. This knowledge helps you select, use, and maintain bright field microscopes with confidence.